The Best Chicken Brine Recipe You’ll Ever Need
Table of Contents
Every home cook dreams of serving a perfectly juicy, flavorful chicken. It’s the kind that has everyone at the table asking for seconds. I remember the first time I discovered the magic of a salt brine recipe. It transformed my dry, bland chicken into a culinary masterpiece that had my family raving.
Brining isn’t just a cooking technique; it’s a game-changing secret. It elevates your chicken from ordinary to extraordinary. With this comprehensive chicken brine recipe, you’ll unlock the key to consistently tender, mouthwatering poultry. It will make you the star of every meal.
Key Takeaways
- Discover the ultimate method for creating juicy, flavorful chicken
- Learn the science behind perfect brining techniques
- Understand optimal brining times for different chicken cuts
- Transform your home cooking with professional-level results
- Prevent dry, tough chicken with simple brining methods
Why Brining Your Chicken Is Essential
Starting with the perfect chicken dish means understanding brining. Chicken can get dry and tough if not cooked right. Brining makes your chicken moist and flavorful, making every bite special.
The science of brining is amazing. When you soak chicken in saltwater, osmosis happens. This lets the meat soak up liquid, making your chicken taste better and stay moist.
Understanding the Molecular Magic
Brining changes chicken at a tiny level. Salt breaks down proteins, letting water in. This makes your chicken tender, even if it’s a bit overcooked.
Benefits of Brined Chicken
- Up to 30% more moisture retention
- Enhanced flavor throughout the meat
- More forgiving cooking process
- Consistent texture across different cuts
Preventing Dry Chicken Syndrome
Brining keeps chicken from drying out. It adds moisture before cooking, keeping it juicy. Here’s how long to brine different chicken types:
- Skinless breasts: 1-2 hours
- Bone-in chicken: 2-3 hours
- Whole chicken: 3-4 hours
“Brining is the secret weapon of professional chefs for creating irresistibly juicy chicken every single time.” – Culinary Expert
Pro tip: Always rinse your chicken after brining and pat it dry to ensure a crispy exterior when cooking.
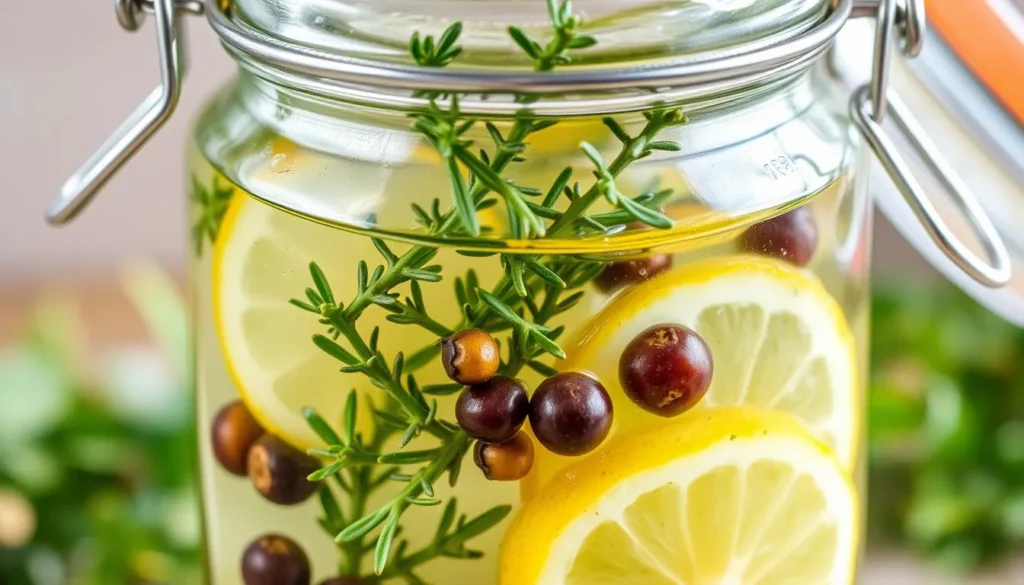
Required Ingredients for Perfect Chicken Brine
Making the perfect salt brine starts with choosing top-notch ingredients. These ingredients turn a simple chicken into a dish to remember. Knowing what to use can take your cooking to the next level.
- Water (8 cups for a 3-5 pound chicken)
- Kosher salt (12 tablespoons of Diamond Crystal or 9 tablespoons of Morton’s)
- Optional sweetener (¼ cup sugar)
- Fresh aromatics:
- Garlic cloves
- Bay leaves
- Whole peppercorns
- Fresh herbs:
- Rosemary
- Thyme
- Parsley
- Citrus (lemon slices)
“The secret to juicy chicken lies in understanding your brine ingredients”
To make a great salt brine, aim for a salt concentration of 4-6%. This helps your chicken keep up to 40% more moisture while cooking. Make sure to dissolve the salt fully in cold water before adding other ingredients.
Pro tip: Try using different liquids like apple juice or beer to add unique flavors. Your brine can be a blank canvas for your creativity!
Basic Chicken Brine Recipe
Learning the perfect chicken brine recipe is key to juicy, flavorful chicken. Your brining technique can turn ordinary chicken into a delicious dish.
Making a tasty chicken brine means knowing the right mix of ingredients and how to prepare them. Let’s explore how to make the best chicken brine.
Base Ingredients Measurements
For a basic chicken brine, you’ll need these main ingredients:
- 2 liters of water
- 3 tablespoons of kosher salt
- 1 tablespoon of whole peppercorns
- Optional aromatics: bay leaves, garlic, rosemary, thyme
Step-by-Step Mixing Instructions
Here’s how to make your perfect brine:
- Put water and salt in a big pot
- Heat it until the salt dissolves
- Add peppercorns and herbs if using
- Let the brine cool down before using it
Temperature Control Tips
Keeping the right temperature is important in brining. Here are some tips:
- Brining time for whole chicken: 8-24 hours
- Brining time for boneless chicken: 2-6 hours
- Always brine in the fridge to avoid bacteria
- Don’t leave chicken at room temperature for more than 2 hours
“A well-executed chicken brine can elevate your cooking from good to extraordinary.” – Culinary Experts
Pro tip: Adjust salt content based on your specific chicken cut and desired flavor intensity.
Essential Kitchen Tools for Brining
Mastering the brining technique needs the right kitchen tools. Your success with chicken marinade depends on choosing the right containers and tools. These make the process smooth and efficient.
- Large non-reactive container (glass, ceramic, or food-grade plastic)
- Brining bags for larger chicken cuts
- Kitchen scale for precise ingredient measurements
- Accurate measuring cups
- Digital food thermometer
Choosing the right container is key for your brining technique. Avoid metal containers that can react with salt and change the chicken’s flavor. Food-safe plastic buckets or large glass bowls are best for keeping the brine intact.
“The right tools transform an average chicken into a culinary masterpiece.” – Professional Chef
| Tool | Purpose | Recommended Type |
|---|---|---|
| Container | Holding brine solution | Food-grade plastic/glass |
| Measuring Tools | Accurate ingredient proportions | Digital kitchen scale |
| Temperature Checker | Ensuring food safety | Digital instant-read thermometer |
Pro tip: Always refrigerate your chicken while brining to prevent bacterial growth. A dedicated brining container with a tight-fitting lid helps keep the temperature consistent. It also prevents cross-contamination in your kitchen.
How to Choose the Right Chicken for Brining
Choosing the right chicken is key for a great brine. Not all chickens are the same. Knowing the differences can make your brining skills top-notch.
Whole Chicken vs. Chicken Parts
Different chicken cuts need different brining methods:
- Whole Chickens: Best for roasting, typically 3-5 pounds
- Chicken Parts: More flexible, quicker to brine
- Bone-in pieces: Retain more moisture during brining
Size and Weight Considerations
The chicken’s weight affects brining success. Smaller chickens, 3-5 pounds, usually work best for brining.
“Choose fresh, high-quality chickens for optimal brining results.”
Here’s a quick guide for chicken weights and brining times:
| Chicken Weight | Recommended Brining Time |
|---|---|
| 3-4 pounds | 1-2 hours |
| 4-5 pounds | 2-3 hours |
| 5+ pounds | 3-4 hours |
Pro tip: Always check chicken freshness before brining. Look for firm, pink meat without any discoloration or unusual odors.
Proper Brining Times and Temperatures
Mastering the brining technique is key for tender chicken full of flavor. The success depends on knowing the right brining time and temperature for each chicken cut.
For whole chickens, brine them for 8 to 24 hours. Brining for less time won’t let enough salt in. But brining for more than 24 hours can make the meat too salty. Here’s a quick guide to brining times:
- Chicken breasts: 30 minutes to 4 hours
- Whole chicken: 8 to 24 hours
- Bone-in pieces: 4 to 8 hours
Keeping the temperature right is important for safety. Always brine chicken in the refrigerator, keeping it below 40°F to stop bacteria from growing. The brine solution should include:
- 1 quart of water
- ¼ cup kosher salt
- ¼ cup sugar (optional)
“The secret to tender chicken is not just in the seasoning, but in the careful balance of brining time and temperature.”
After brining, rinse your chicken to get rid of extra salt. Let it rest for a few minutes before cooking. This helps the juices spread evenly, making the chicken moist and full of flavor.
Flavor Enhancers and Aromatics
Make your chicken marinade stand out by exploring flavor enhancers and aromatics. The right mix of herbs, spices, and other ingredients can take your chicken to new heights.
Herbs and Spices That Wow
Creating a great chicken brine is an art. It’s more than just salt and water. Here are some flavors to make your chicken unforgettable:
- Fresh rosemary and thyme for a classic taste
- Crushed peppercorns for a hint of heat
- Dried bay leaves for depth
- Smoked paprika for a smoky flavor
Citrus and Sweet Sensations
Add brightness to your chicken marinade with these:
| Citrus Options | Sweetener Choices |
|---|---|
| Lemon zest | Honey |
| Orange slices | Brown sugar |
| Lime juice | Maple syrup |
“The secret to a perfect chicken marinade lies in balancing bold flavors with subtle undertones.” – Professional Chef
When making your brine, use the right ratio. It’s 1 part kosher salt to 2 parts sugar to 16 parts water. This balance keeps your chicken moist and tasty.
Try different mixes to make your own special marinade. Whether you want Mediterranean, Asian, or classic American flavors, the right aromatics can change everything.
Common Brining Mistakes to Avoid
Brining chicken right is key to avoiding mistakes that can ruin your dish. Many home cooks make simple errors that affect the taste and texture of their chicken. These mistakes can turn a great meal into a disappointing one.
Here are the most common mistakes when brining chicken:
- Over-Brining: The biggest mistake is leaving chicken in brine too long. Optimal brining time is 1-2 hours for chicken breasts and 4-6 hours for whole chicken.
- Incorrect Salt Ratio: Using the wrong salt-to-water proportion can result in excessively salty meat. The ideal concentration is 1 cup of kosher salt per gallon of water.
- Wrong Container Selection: Avoid reactive metal containers that can alter taste. Use non-reactive glass, ceramic, or food-grade plastic.
Temperature control is crucial when brining chicken. Never leave your chicken at room temperature for extended periods. Always brine in the refrigerator to prevent bacterial growth and ensure food safety.
“The secret to perfectly brined chicken is precision and patience.” – Professional Chef
Remember these key guidelines to achieve consistently juicy chicken:
- Stick to recommended brining times
- Use precise salt measurements
- Maintain cold temperatures
- Rinse chicken before cooking to remove excess salt
By avoiding these common brining mistakes, you’ll transform your chicken from bland to grand. This ensures tender, flavorful results every time.
How to Cook Brined Chicken
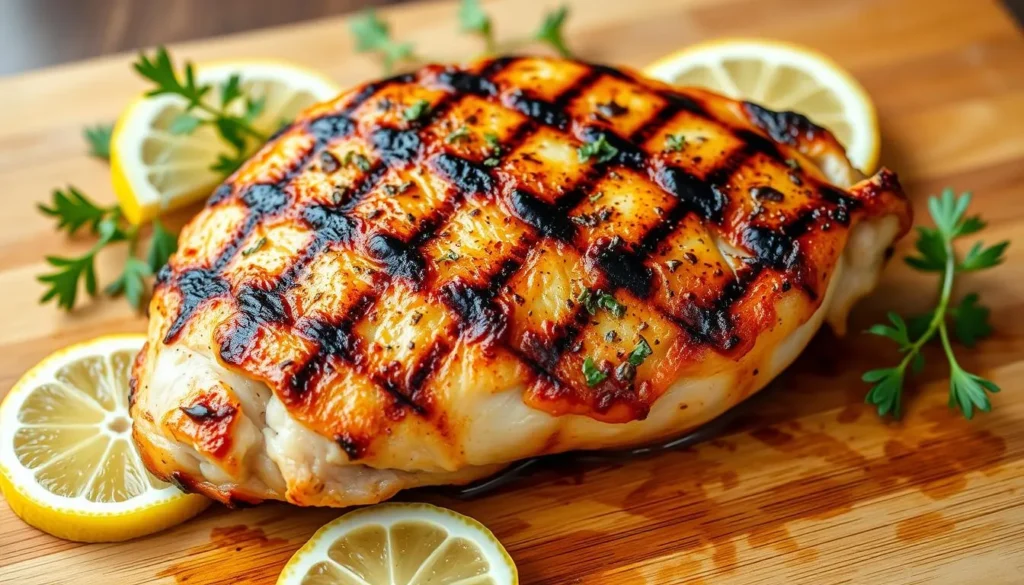
Turning your brined chicken into a delicious meal needs the right cooking methods. Whether you choose to roast or grill, these steps will help you achieve tender, flavorful chicken.
Roasting Your Brined Chicken to Perfection
Roasting is the best way to enjoy juicy chicken. First, heat your oven to 425°F. Then, follow these important steps:
- Pat the chicken dry with paper towels
- Place chicken on a roasting rack
- Cook until internal temperature reaches 165°F
- Let rest for 10-15 minutes before serving
Grilling Techniques for Maximum Flavor
Grilling your brined chicken gives it a crispy outside and a juicy inside. Here are some expert tips:
| Grill Setting | Cooking Details |
|---|---|
| Temperature | 400-425°F |
| Cooking Time | 10 minutes per chicken breast |
| Internal Temperature | 165°F |
“The secret to tender chicken is not just in the brine, but in the careful cooking technique.” – Culinary Expert
Pro tip: Always use a meat thermometer to check if your chicken is at 165°F. This ensures it’s both safe and juicy.
Try different herbs and spices to make your chicken unique. Your brined chicken will be the highlight of any meal, offering restaurant-quality taste from your kitchen.
Storage and Food Safety Guidelines
Learning to brine chicken is more than just mixing ingredients. It’s about safe handling and storage for tasty and healthy dishes. Knowing food safety rules helps avoid health risks and boosts flavor.
Here are key safety tips for brined chicken:
- Always keep raw chicken and brine refrigerated at or below 40°F
- Use clean, sanitized containers for brining
- Discard used brine immediately after preparing chicken
- Pat chicken dry with paper towels before cooking
“Food safety isn’t an option—it’s a necessity in every kitchen.” – Professional Chef Recommendation
Brining requires careful temperature control. Cool your brine completely before adding chicken. Adding ice cubes helps cool it faster, stopping bacteria growth and preparing meat better.
Here’s how to store brined chicken:
- Refrigerate brined chicken immediately after preparation
- Consume within 1-2 days for maximum freshness
- Never leave brined chicken at room temperature for more than 2 hours
- Freeze brined chicken if not cooking within 48 hours
By sticking to these tips, you’ll make delicious, safe brined chicken every time. This keeps both flavor and health in check.
Creating Your Own Signature Brine Variations
Learning the basic chicken brine recipe is just the start. It opens up a world of culinary creativity. You can make your own unique brine that tastes amazing!
Start by trying out different flavor combinations that you like. It’s important to know how each ingredient works together. This way, you can make a brine that is both balanced and delicious.
“Creativity is the secret ingredient in every exceptional chicken brine recipe.”
Flavor Exploration Strategies
- Experiment with regional spice blends
- Incorporate seasonal herbs and aromatics
- Balance salt, sugar, and flavor enhancers
- Consider cooking method when designing your brine
When making your own chicken brine recipe, remember these key points:
- Keep the salt ratio at 1/4 cup per quart of water
- Brine for 4-12 hours for the best taste
- Use fresh herbs and whole spices for the best flavor
Here are some fun flavor combinations to try in your chicken brine:
- Mediterranean blend: Rosemary, thyme, and oregano
- Asian-inspired: Ginger, star anise, and green onions
- Spicy Southwest: Chipotle, cumin, and lime zest
Pro tip: Keep a culinary journal to track your brine experiments. Note the ingredients, ratios, and results. This will help you refine your perfect chicken brine recipe over time.
Conclusion
You now have top-notch skills in making chicken brine recipes. A good brine turns simple chicken into a feast for the taste buds. With just 4 cups of water, 1/4 cup kosher salt, and a few aromatics, your cooking can go from basic to gourmet.
Making juicy chicken is not hard—it’s about knowing the science and trying new things. Every time you brine, you get better, creating dishes that wow your loved ones. The secret is finding the right mix of salt, time, and flavor for moist meat every time.
Enjoy learning and don’t hesitate to try new things with your chicken brine. Whether it’s for a quick dinner or a big event, your skills will make the chicken tender and tasty. The kitchen is your place to play—start brining and see the amazing flavors you can create!
FAQ
How long should I brine a whole chicken?
Brine a whole chicken for 8-12 hours, or overnight, in the fridge. Don’t brine it for more than 24 hours to avoid too much salt. For smaller chicken pieces, brine them for 2-4 hours, depending on their size.
Can I use table salt instead of kosher salt for brining?
Use kosher salt for brining. Table salt is denser and can make the brine too salty. If you use table salt, cut the amount by about 50% to get the right salt level.
Is it safe to brine chicken at room temperature?
No, always brine chicken in the fridge to avoid bacterial growth. Keep the chicken between 40°F and 140°F to prevent dangerous bacteria. Refrigeration keeps the chicken safe and helps the brining process.
Can I reuse a chicken brine?
Never reuse a brine that’s been with raw chicken, as it can be very dangerous. Always throw away the used brine and make a fresh batch for each brining session to avoid bacterial contamination.
How does brining affect the cooking time of chicken?
Brined chicken cooks faster and more evenly than unbrined chicken. The salt and moisture in the brine help it cook more uniformly. This can cut cooking time by 10-20%. Always use a meat thermometer to check if the chicken is at 165°F.
Can I brine kosher or pre-salted chicken?
Don’t brine kosher or pre-salted chicken, as they’ve already been salted. Extra brining can make the meat too salty and affect its texture. Use fresh, unprocessed chicken for the best results.
What’s the best container for brining chicken?
Use a non-reactive container like a food-grade plastic container, glass dish, or brining bag. Avoid metal containers, especially aluminum or copper, as they can react with the salt. Make sure the container is big enough to fully submerge the chicken.
How can I prevent my brined chicken from being too salty?
To avoid over-salting, carefully follow the salt-to-water ratio and brining time. Rinse the chicken with cold water after brining. Pat it dry before cooking to remove excess salt and ensure a balanced flavor.

![Corkscrew Pasta]](https://www.recipesadam.com/wp-content/uploads/2025/03/Corkscrew-Pasta-768x439.webp)