Easy Banana Pudding Recipe: Why This Is the Ultimate Comfort Food
Table of Contents
Growing up in the South, I learned banana pudding is more than a dessert. It’s a cherished memory wrapped in creamy layers of nostalgia. Every family gathering, church potluck, and summer barbecue seemed incomplete without it.
The easy banana pudding recipe I’m about to share isn’t just another dessert. It’s a culinary tradition that connects generations, bringing warmth and sweetness to any table. What makes this banana pudding so special is its simplicity and ability to create instant smiles.
Whether you’re a seasoned home cook or a kitchen novice, this no-bake dessert promises to become your new favorite go-to recipe. With just a few ingredients and minimal preparation time, you’ll create a crowd-pleasing treat that captures the essence of Southern hospitality.
Key Takeaways
- Discover an authentic Southern banana pudding recipe
- Learn a simple, no-bake dessert technique
- Create a crowd-pleasing comfort food in minutes
- Experience a classic dessert with minimal ingredients
- Understand the cultural significance of banana pudding
The History of Southern Banana Pudding Tradition
Banana pudding is a key part of Southern cuisine. It’s a classic recipe that shows the heart of southern comfort food. The story starts in the late 19th century. Back then, banana imports to U.S. ports went from 12.5 million to 16 million bunches between 1895 and 1900.
The first mention of this dessert was in 1878. A big moment came in 1888 when Good Housekeeping shared a recipe. It told readers to layer sponge cake, bananas, and custard. This dessert became more popular with important events:
- 1900: Nilla wafers introduced
- 1940s: Nabisco began printing banana pudding recipes
- 1964: Jell-O launched banana cream pudding mix
- 1950s: Banana pudding solidified its Southern identity
The dessert’s rise was tied to big cultural changes. By 1966, home cooks could use Cool Whip instead of meringue. Newspapers like the New York Age in 1956 saw it as a “Tasty Treat” of the South.
Banana pudding became more than just a dessert – it was a culinary tradition passed down through generations.
Its appeal comes from Southern cooking’s practical side. The recipe is simple to make in big batches. It’s also great for hot weather, as it doesn’t need an oven. Each serving tells a story of community, family gatherings, and culinary heritage.
Banana pudding is a beloved dish at community events and family reunions. It brings people together with its sweet, nostalgic taste.
Why This No-Bake Dessert Became a Family Favorite
Banana pudding has won the hearts of families across the United States. Its charm and simplicity make it a beloved classic. It brings people together in a delightful way.
This no-bake dessert is loved for its versatility and ease. Busy home cooks love how quickly it’s made. It looks and tastes like it took hours, but it didn’t.
Perfect for Casual Entertaining
Hosting a casual gathering? This banana pudding is your secret weapon. It’s simple yet elegant, allowing you to:
- Prepare in advance with minimal effort
- Serve a dessert that looks impressive
- Accommodate various dietary preferences
- Create a nostalgic treat everyone loves
A Time-Tested Crowd Pleaser
“There’s something magical about a dessert that brings generations together.” – Southern Cooking Tradition
The creamy layers and classic flavor make it a hit at any event. It’s perfect for family reunions or neighborhood potlucks. It always brings smiles and requests for more.
Ideal for Potlucks and Gatherings
Your no-bake dessert solution is here! This banana pudding serves up to 16 people. It’s quick to prepare and only needs 3 hours to chill.
Nutritional bonus: Each serving has only 238 calories. It’s a guilt-free treat for everyone.
Essential Ingredients for the Perfect Banana Pudding
To make the ultimate homemade pudding, you need the right ingredients. These ingredients should work together to create a delicious dessert. Your banana pudding will be amazing if you pick the best parts with care.
Choosing the Right Vanilla Wafers
Nilla wafers are the top choice for banana pudding. They add a crisp, sweet texture and flavor. When picking vanilla wafers, remember these tips:
- Look for fresh, crisp Nilla wafers
- Check for packages with minimal breakage
- Consider alternative options like Pepperidge Farm Chessmen Cookies
Selecting and Preparing Bananas
Fresh bananas are key for a great vanilla pudding. Choose bananas that are ripe but not too soft:
- Select bananas with yellow skin and minimal brown spots
- Use 3-4 large ripe bananas per recipe
- Slice bananas just before assembling to prevent browning
Pudding Mix and Whipped Topping Options
Your pudding’s base is built on quality ingredients. For the best taste, follow these suggestions:
- Use instant vanilla pudding mix (two 3.4 oz packages)
- Opt for sugar-free alternatives if desired
- Choose between store-bought Cool Whip or homemade whipped cream
Pro tip: Refrigerate your banana pudding for at least 4 hours to allow flavors to meld perfectly!
Easy Banana Pudding Recipe: Step-by-Step Instructions
Making a tasty homemade pudding is easy with this classic banana pudding recipe. It’s simple to turn basic ingredients into a dessert that everyone will love.
Here’s what you’ll need for this delightful easy banana pudding recipe:
- 1 family-size box of Vanilla Jello pudding (3.4 oz)
- 2 cups whole milk
- 4-5 ripe bananas
- 16 oz Cool Whip
- 2 cups vanilla wafers
- 1 can (14 oz) sweetened condensed milk
- 1 tsp vanilla extract
Preparation is quick and easy. Start by mixing the pudding mix with whole milk. Let it sit for 10-15 minutes to set. While waiting, slice your bananas – choose ones that are yellow with slight brown spots for the best flavor.
“The secret to a perfect banana pudding is in the layers and freshness of ingredients!” – Southern Dessert Experts
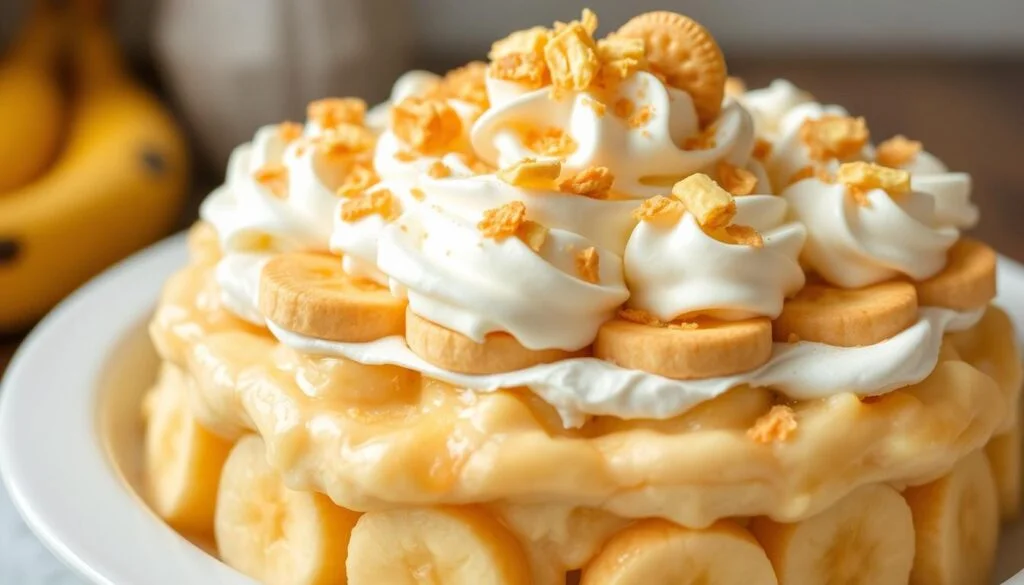
Layer your ingredients carefully. Start with vanilla wafers, then banana slices, and finally the pudding mixture. Repeat these layers, making sure they’re evenly distributed. Top with a generous layer of Cool Whip.
Chilling is crucial for this dessert. Chill your banana pudding for at least 4 hours, or overnight for the best results. This lets the flavors mix and creates a creamy texture.
Pro tip: To keep your pudding fresh and safe, minimize time at room temperature and return it to the refrigerator quickly after serving. The pudding will stay delicious for up to 3 days when stored properly.
Tips for Layering Your Banana Pudding
Making the perfect creamy banana dessert is more than just mixing. Layering is key to making it amazing. It ensures every bite has the right mix of flavors and textures.
Creating Even Layers
Even layers make your banana pudding stand out. Here’s how to do it right:
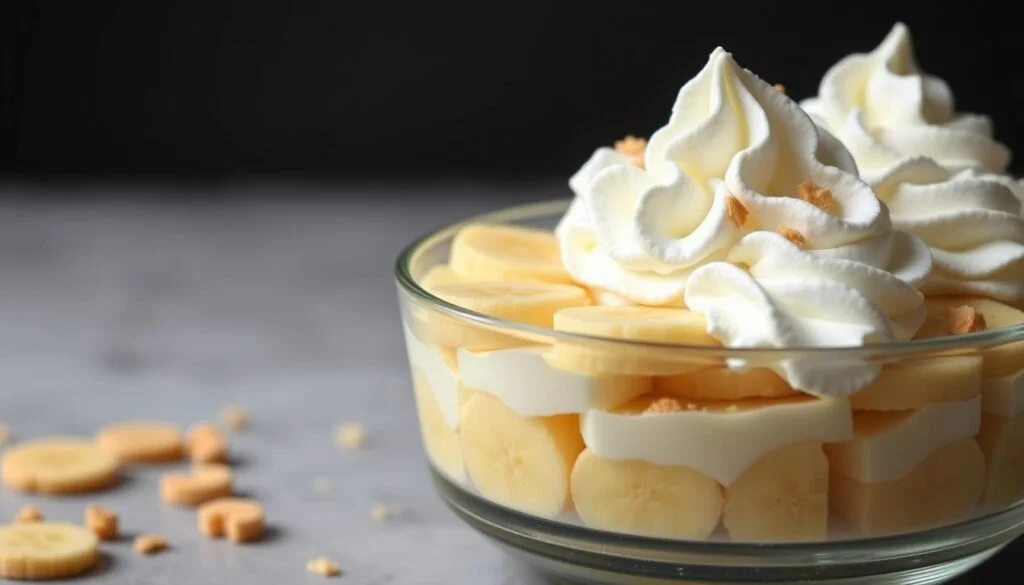
- Choose a clear glass dish to show off your layers
- Spread each layer carefully to keep them separate
- Make sure each layer is the same thickness
Proper Order of Ingredients
The right order of layers is important for nilla wafers and banana pudding:
- Begin with a thin layer of pudding at the bottom
- Add a layer of nilla wafers
- Put sliced bananas on top
- Cover with pudding mixture
- Repeat steps 2-4 a few times
Presentation Techniques
Make your banana dessert look great with these tips:
| Technique | Impact |
|---|---|
| Crumble extra nilla wafers on top | It adds crunch and looks good |
| Use lemon juice on banana slices | It keeps them from turning brown |
| Pipe whipped cream decoratively | It gives a professional touch |
Pro tip: Chill your banana pudding for at least 3-4 hours. This lets the flavors mix and the layers set well.
Remember, patience is key when making the ultimate layered banana pudding. It will wow your family and friends.
Make-Ahead Tips and Storage Guidelines
Making your homemade pudding ahead of time can save you a lot of effort. It also makes your banana dessert taste even better. This is because the fresh bananas and wafers get to blend together perfectly over time.
- Chill the pudding for at least 8 hours to allow flavors to develop
- Prepare the dessert up to 1 day in advance for optimal taste
- Store in an airtight container in the refrigerator
Storing your homemade pudding right is crucial. It keeps the texture and taste just right. The right way to store it makes sure your bananas stay fresh and the dessert stays tasty.
| Storage Detail | Recommendation |
|---|---|
| Maximum Storage Time | 4-5 days in refrigerator |
| Recommended Chill Time | 8-24 hours |
| Best Serving Temperature | Slightly chilled |
“The secret to an amazing banana pudding is patience and proper storage!” – Southern Dessert Experts
Pro tip: When you’re ready to serve, let your pudding sit at room temperature for about 10-15 minutes. This slight warming brings out the flavors and makes it even more delightful.
Creative Variations and Substitutions
Make your classic banana pudding recipe exciting with creative twists. These changes keep the old-fashioned recipe fresh and fun. Whether you want to cut down on sugar or try new tastes, these ideas will let you make your banana pudding your own.
Sugar-Free Options
If you’re watching your sugar intake, you can still enjoy banana pudding. Here are some sugar-free alternatives:
- Use sugar-free instant pudding mix
- Replace regular whipped topping with a sugar-free version
- Substitute some bananas with berries to reduce overall sugar content
Alternative Cookie Choices
Vanilla wafers are classic, but you can try other cookies for a different texture:
- Graham crackers for a honey-like sweetness
- Pepperidge Farm Chessmen cookies for a buttery crunch
- Shortbread cookies for a rich, delicate base
Flavor Enhancements
Take your banana pudding to the next level with these tips:
- Add 1 teaspoon of vanilla extract for depth
- Sprinkle ground cinnamon for warmth
- For adults, a splash of rum can create an interesting twist
- Mix in fresh berries for color and additional flavor
“The beauty of banana pudding is its versatility – don’t be afraid to make it your own!” – Southern Dessert Experts
The secret to a great banana pudding is finding the right balance. It’s all about flavors and textures. So, go ahead and experiment. Enjoy making your banana pudding your own!
Common Mistakes to Avoid When Making Banana Pudding

Making the perfect banana pudding is more than just mixing ingredients. Many home cooks face common mistakes that can ruin a great dessert.
Working with fresh bananas needs careful timing and technique. Here are the most common errors to avoid:
- Selecting overripe bananas that turn mushy and brown
- Rushing the chilling process before serving
- Improper layering techniques that compromise texture
- Using warm pudding that melts whipped topping
Choosing the right bananas is key for your banana pudding. Choose bananas that are ripe but still firm – those with a few brown spots but still firm.
| Mistake | Consequence | Solution |
|---|---|---|
| Overripe Bananas | Mushy, discolored texture | Use slightly firm bananas with minimal brown spots |
| Inadequate Chilling | Runny, separated layers | Refrigerate 8-12 hours before serving |
| Improper Layering | Uneven flavor distribution | Create distinct, even layers of wafers, bananas, and pudding |
“Perfection in banana pudding is all about patience and precision” – Southern Dessert Experts
Your goal is a creamy, well-structured dessert that highlights fresh bananas. Take your time, follow the steps carefully, and you’ll make a memorable treat every time.
Why This Recipe Works Every Time
Your southern comfort food adventure reaches perfection with this creamy banana dessert. It consistently delivers delicious results. The magic lies in its foolproof preparation and carefully balanced ingredients.
Understanding why this banana pudding recipe succeeds requires examining its key components:
- Simple ingredient list minimizes potential errors
- Perfect balance between sweet pudding and fresh bananas
- Strategic layering technique ensuring flavor in every bite
- No-bake method reducing cooking complexities
The recipe’s success stems from precise ingredient ratios. With specific measurements like 12 oz evaporated milk and 6 large egg yolks, you create a consistent texture. This transforms ordinary ingredients into an extraordinary dessert.
| Ingredient Impact | Contribution to Success |
|---|---|
| Whole Milk | Higher fat content creates creamier texture |
| Egg Yolks | Provides approximately 5% fat per yolk |
| Vanilla Wafers | 15% moisture absorption enhances layering |
Pro tip: Refrigerate your pudding for 2-3 hours before serving. This allows flavors to meld perfectly. This waiting period transforms good into truly exceptional southern comfort food.
The beauty of this recipe is its adaptability – minor adjustments won’t compromise its delightful outcome.
By understanding these principles, you’ll create a creamy banana dessert that impresses every single time.
Serving Suggestions and Presentation Ideas
Your southern comfort food masterpiece deserves a stunning presentation. Banana pudding offers many serving options for any occasion. It’s perfect for casual family dinners or elegant gatherings.
- Classic Glass Trifle Dish: Showcases beautiful layers
- Individual Mason Jars: Perfect for personalized portions
- Traditional Baking Dish: Serves large groups effortlessly
- Elegant Dessert Cups: Adds sophisticated touch
Elevate your banana pudding’s visual appeal with these garnishing techniques:
- Sprinkle crushed vanilla wafers on top
- Arrange fresh banana slices artfully
- Drizzle caramel sauce for extra decadence
- Add a mint leaf for color contrast
| Serving Style | Best For | Portion Size |
|---|---|---|
| Trifle Dish | Large Gatherings | 12-16 servings |
| Mason Jars | Individual Servings | 1 serving each |
| Baking Dish | Family Meals | 8-10 servings |
Serve your banana pudding slightly chilled. Let it sit at room temperature for 30 minutes before serving. This makes the flavor better and the texture creamier.
“The art of serving banana pudding is as important as making it!” – Southern Dessert Experts
Remember, presentation makes a simple dessert unforgettable. Your banana pudding will not only taste great but also look amazing!
Conclusion
Your journey through this easy banana pudding recipe shows why it’s loved by many. It only takes 15 minutes to prepare. You’ll need ripe bananas, vanilla wafers, and creamy custard to make it.
This dessert is perfect for any event. It’s great for family gatherings or potlucks. Each layer of sweet bananas, crisp wafers, and smooth custard creates a special experience.
Now, your kitchen can feel like a place of Southern hospitality. Making this banana pudding is more than just cooking. It’s about keeping a tradition alive that brings comfort and warmth to our homes.
Great recipes are about making people happy. Your banana pudding will become a favorite. It will bring smiles and warmth to everyone who tries it.
FAQ
How far in advance can I make banana pudding?
You can make banana pudding up to 24 hours ahead. Keep it in the fridge, covered. Add fresh banana slices 2-3 hours before serving to keep it fresh.
Can I use instant pudding mix instead of making pudding from scratch?
Yes! Instant vanilla pudding mix is quick and easy. Just mix it with milk as the package says for a simple base.
How do I prevent bananas from turning brown in the pudding?
Slice bananas just before using. Dip them in lemon or pineapple juice briefly. This keeps them from turning brown.
Can I make a sugar-free version of banana pudding?
Yes! Use sugar-free pudding mix, whipped topping, and vanilla wafers for a lighter dessert.
What are the best bananas to use for banana pudding?
Pick bananas that are ripe but still firm. They should have a few brown spots. Avoid soft or green bananas.
How long can banana pudding be stored in the refrigerator?
Store it in an airtight container for up to 3 days. But for the best taste, eat it within 24-48 hours.
Can I freeze banana pudding?
Freezing banana pudding is not recommended. The texture changes when thawed. It’s best enjoyed fresh or refrigerated.
What are some creative alternatives to Nilla Wafers?
Try graham crackers, shortbread cookies, Chessmen cookies, or crushed vanilla sandwich cookies. They add a unique twist.
Is banana pudding considered a healthy dessert?
Banana pudding is high in calories. But, you can make it healthier with low-fat milk, sugar-free mix, and smaller portions.
Can I make banana pudding dairy-free?
Yes! Use almond or coconut milk and non-dairy whipped topping for a lactose-free version.